After careful contemplation on leaving the bed in its original state or painting it, I decided I would take the tips I found from two blogs and transform this beautiful antique, family treasure into something spectacular...fingers crossed!!! I am crafty but not so much with paint or manual labor! Here are the blogs for my inspiration:
http://osofaboreillys.blogspot.com/2011/06/audreys-big-girl-bed.html
http://missmustardseed.blogspot.com/
And what kind of paint I used:
http://www.anniesloan.com/
which can be purchased locally--message me for details if you want to know where:)
After deciding exactly what I wanted to do, I struggled with the colors. I liked the color from O So Fab Oreillys blog but also liked the color "Provence" on the paint website. I did more research...until finally committing on Duck Egg Blue, Old White and Clear Wax. Exactly what Oreilly used on her daughters bed. The only difference, I didn't want quite as much white-washing on Paige's bed. This paint requires NO sanding, NO priming, NO nothing before you use it. Buyer BEWARE: it is pricey BUT it covers wonderfully!!! You also don't have to sand or prime so factor in those costs but for a quart it was $38.95. So I spent about $110.00 on the blue, white and wax. I have half a quart of the blue left and almost all of the white and 1/3 of a can of wax! It really goes a LONG way!
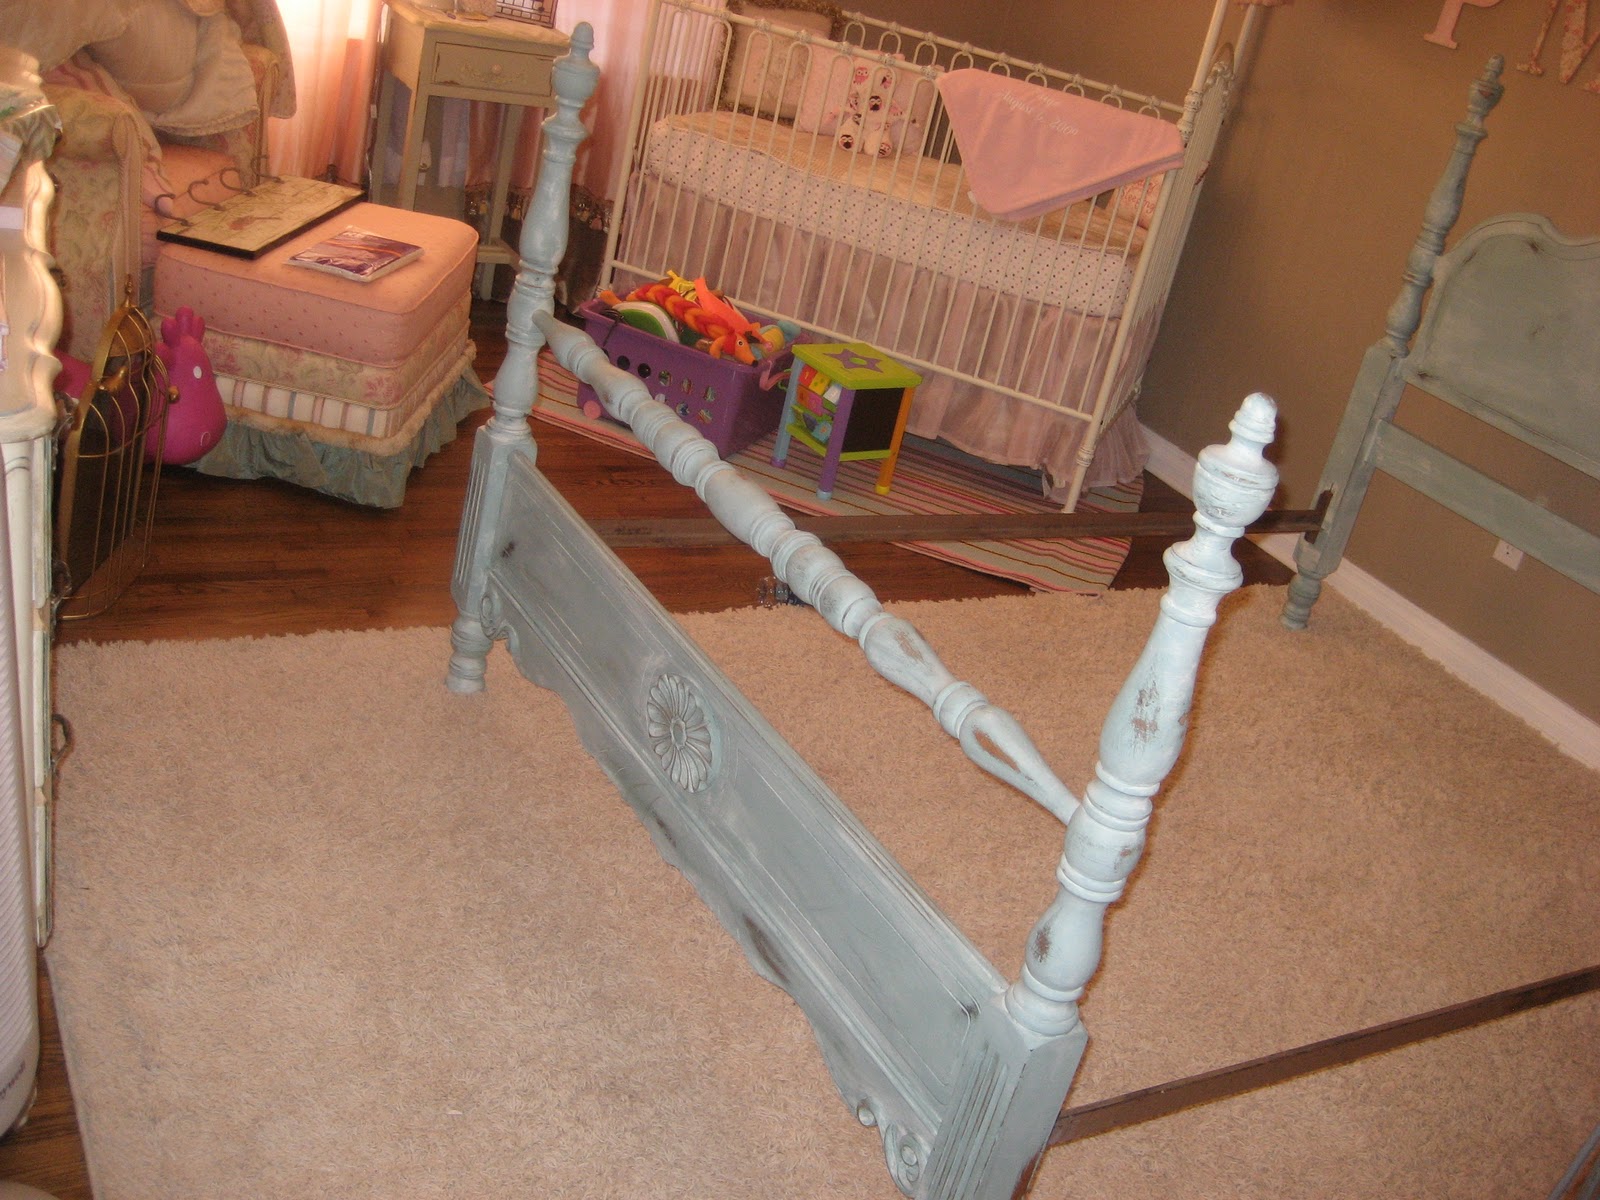
Here is the bed after the blue paint:
The paint really brought out the detail work of the bed!! Even Tyler commented on how pretty it was! Which of course always gives me anxiety of the next steps..."Will I ruin the bed when I attempt white-washing?!?! Its already so beautiful, what if I ruin it all!!!!" So I had Janet come to help and supervise
and to blame her if it were totally ugly when we added the white!
Here is the beauty after white-washing:
The method we used was take the white paint-we originally started with about a 60% paint / 40% water ratio but quickly realized we needed more water so we weren't wearing ourselves out wiping off the paint. It is really thick, good quality paint!! (I wish I were getting paid to say all of these nice things!! Maybe I should write a letter to Annie Sloan and tell her about my blog and the 4 people that will read my FREE advertisement!!) Ok, back to my original thought--Janet brushed the white on with a normal paint brush and I wiped the excess to my desired "whiteness" with a damp rag. It was so quick and easy and I honestly thought this would be the hardest part! P.S. This is in horrible garage lighting, with a camera phone so the bed isn't nearly as white as the pic may lead you to believe but you will see shortly...
Then all that was left was sanding for a distressed look (also have never done such a thing) and waxing. Yesterday morning I drank some coffee and headed to the garage hunting for some sandpaper. I definitely didn't trust myself with a hand sander. I was alone and afraid...actually a blind doberman and a toddler were supervising but I was scared!! After I messed with it for a bit, running in and out of the house to look at different distressed pieces I have and some on the internet, I got to my desired "distress". Then I had a few spots that I decided were too distressed so I just brushed a tiny bit of blue paint and got it just right!!


The final step was a clear wax application which protects the paint and also brings out the original color where you distress. I read the label carefully and it was not a safe for preggo substance so I called in my SIL to rescue us and finish off the project!! She did a wonderful job and she used a combo of a rag application and a brush application. For all of the small, detail spots, a brush was necessary but everywhere else she was able to rub it in with a rag and it was like a magic potion as she rubbed it on! The bed just glowed beautiful colors of blue, white and original wood peeking through in a few spots! While the wax was drying or whatever it does...Paige and I went to purchase her new mattress!!! While she napped, I cleaned her room, reorganized things, moved the crib to the corner, rearranged rugs...everything except move the bed in. Daddy would have to do that when he was done golfing--I have too many projects to complete to put myself into labor 8 weeks early!!
The mattresses were delivered last night about 8 pm and here is P anxiously awaiting me to finish making her bed:
And getting to try it out for the first time!!!
And here is another shot of the bed and room layout, pre-mattress delivery:
So we have a crib for baby sis, a full sz bed for P, a glider to read and feed babies, a chest to store pretty clothes, a night stand a bookshelf, toy box, random animals and toys and much more in this room...I think it may be Mary Poppins purse!!! It actually looks really cute and there is plenty of room! Not cluttered at all!!
The last things for this room will be a bedskirt for Paige's bed, a bumper for Baby, and hang their things on the wall and hopefully some fun family photos of special women in our family!! I hate posting photos before I'm all done but I knew if I didn't I probably would never do it!


It looks so pretty in her room! Great job!
ReplyDeleteLOVE it! I'm so jealous of your creativity. :)
ReplyDelete